Photoshop Elements: Autumn Effect

Today, I'm really excited to be showing you a new Adobe Photoshop Elements tutorial. With my favorite season approaching {autumn!}, I'm really excited for photography. It's my favorite time to take photos, run a blog, eat, dress… well, basically just live! In Michigan, we are lucky to see such amazing fall colors. But if you live in an area where you don't see much autumnal color OR you're just looking to make the colors you do see pop out more, follow along! I'm going to show you how to create an amazing autumn effect for your photos.


1. Open up your image in Adobe Photoshop Elements. Make sure you choose an image that will reflect autumn well. Like a forest, a street lined with trees, bushes, fields, etc.

2. First, let's make our leaves pop. Using your "free lasso" tool (the little rope in your left sidebar), start making some selections in the trees. It doesn't have to be perfect - just select some spots where the leaves might be changing.
Note: Holding down the shift button will allow you to select multiple areas.

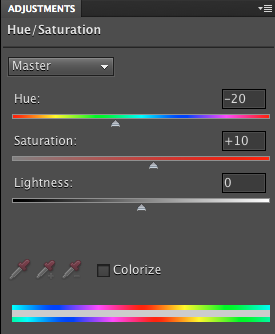
3. Create a new Adjustment layer > Hue/Saturation. In your adjustments pallet, change Hue to -20. Every photo is different, so keep an eye on your photo to make sure it doesn't look too fake. Change Saturation to +10 or so.
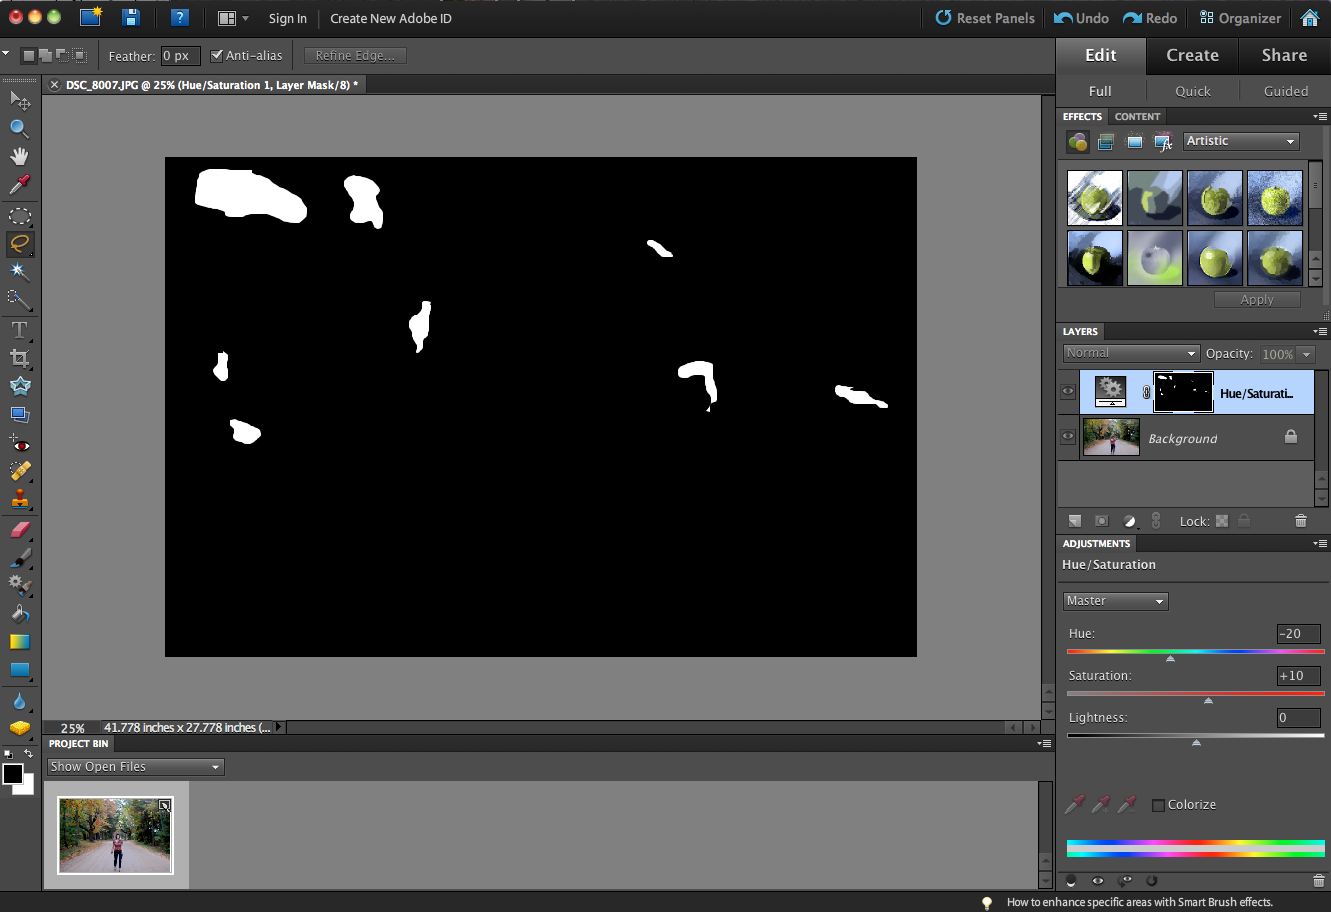
4. With your Hue/Saturation layer selected, hold down option (for a mac) or alt (for a pc) and click your layer. That will turn it into a mask. You'll see your photo turn black & white. The white spots are the selections you created with your free lasso tool.

5. Since the lines we drew were pretty abrupt, let's feather it out a bit. Go up to your top menu and select Filter > Blur > Gaussian Blur. Change your radius to about 40 pixels or so.
Use your best judgment though!

6. Click on the eyeball in your layers pallet to see the original image again. If you click the eyeball on and off, you'll see how the colors now pop in your leaves!

7. But we're not done yet! Let's add a filter to the overall image. Create a new Adjustment layer > Levels.


8. In your adjustments pallet, under RGB, change your middle number to 1.12 (reference top screenshot). This will brighten your image. Using your pull-down menu for RGB, we're going to adjust each level for red, green and blue using the numbers below. Be sure to enter these in the output levels.
Red: 62, 234
Green: 0, 240
Blue: 0, 255

9. If that overall look is too much for you, just change your opacity on this layer in the layers pallet. I would probably go anywhere from 50-75%. (But I also LOVE filters on my photos so sometimes I'll go the full 100%!)
