Photoshop Elements: Collages&Clipping Masks
Hey everyone! As you all know, I've teamed up with Adobe Photoshop Elements and this is one of the first tutorials I'll be posting. I'm really looking forward to sharing what I've learned in this program and how I apply it to my own blogging routine. I'm constantly striving to tell a good story on Selective Potential between outfit posts, the adventures I go on, the trips I take and other random tidbits about my life. I found creating collages really helps to tell a story. Readers get a sneak peek into what I'm seeing without having to stroll through an entire album of photos. So today, I'm going to show you how to create a photo collage in Photoshop Elements!

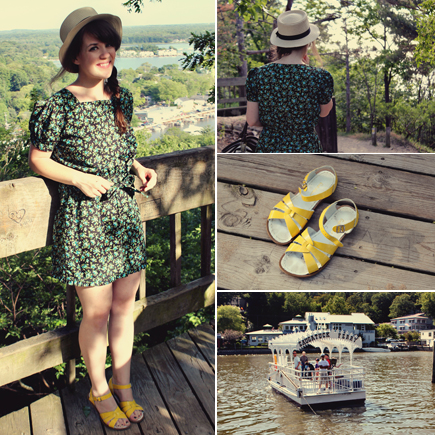
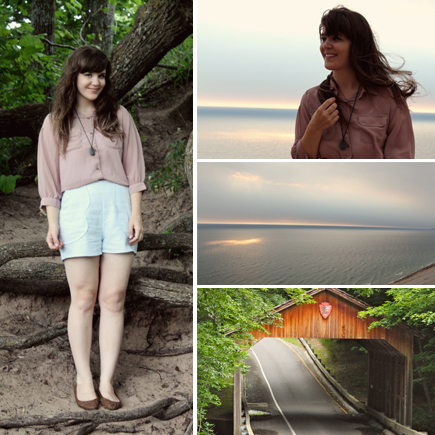
In order to create a good collage that tells a story, you need to have an interesting variety of photos. Think small... and think variety. Scenic views, signs, details of your outfit, unique things you saw, textures and things you want to show, but may not want to post a full size image of. Try some far away and some closeup shots and combining the two. A good mix of photos will give you a leg up on creating a great collage.
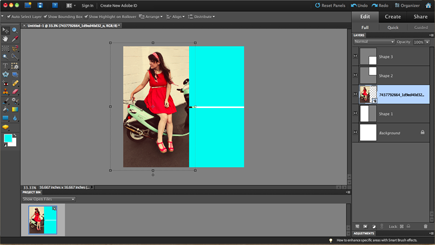
After you've snapped some photos and you're ready to make your collage, go ahead and open up your Adobe Photoshop Elements program. Create a new blank file at any size you'd like. Start by creating shapes. This is where you can get really creative. Typically I stick to the clean, grid lines but you can do anything you want here. Draw your shapes out and they will automatically be on separate layers like you're seeing in my right sidebar here.
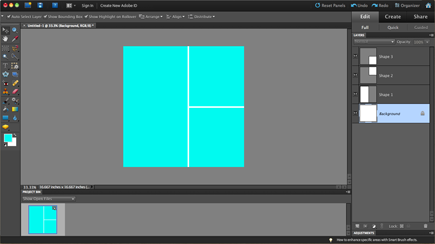
Once you have a good, working grid... go ahead and place your photo, using File > Place. Make sure your photo layer is above the shape you're looking to fill. Once your photo is placed, go to Layer > Create Clipping Mask. It will automatically transform to the shape you created. Then you can move your photo layer to position it perfectly within your grid. Once you're happy with that result, repeat that step however many times to fill your grid. Just make sure your photo layer is above the shape layer, and create your clipping mask. SO easy!
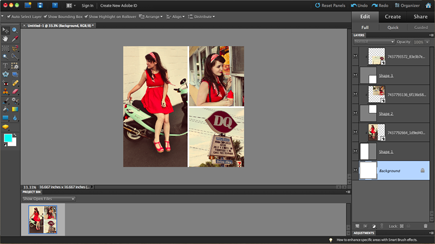
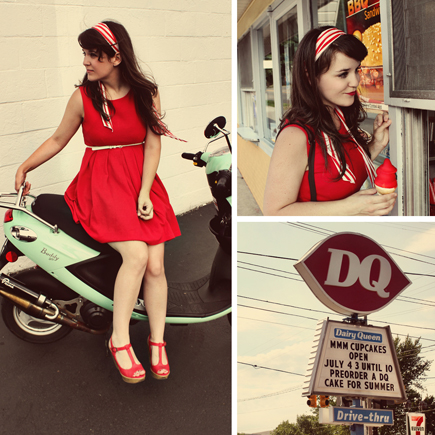
And the finished result? An amazing, interesting collage that not only tells a great story... but adds life to your photos on your blog! Plus, you can showcase so many more photos than you would if you didn't create a collage. It's really inspired me to take more photos and try to tell better stories!
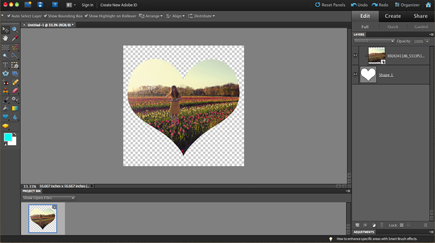
And while I'm on the topic of clipping masks and you guys are so great at using them and creating collages... I thought I'd sneak in one more tiny trick. You don't have to stick to square shapes! You can create circle collages, heart collages or just use one giant heart to create a fun and interesting photo! Photoshop Elements has several shapes for you to choose from... just choose custom shape from your toolbar and select from the several they have available!
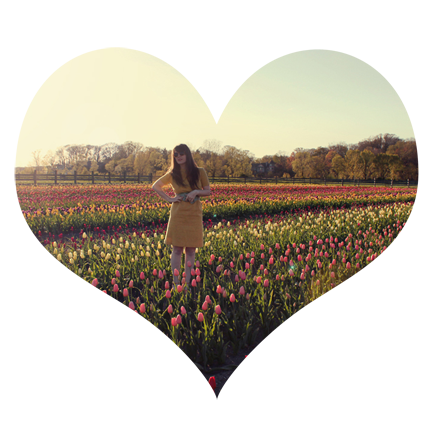
The steps are basically the same as creating your collage. Draw out your shape using the shape tool.
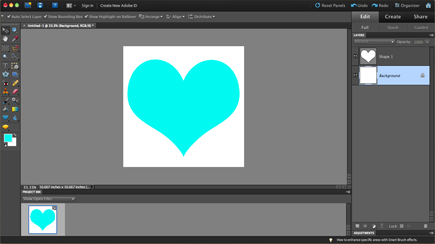
Then place your photo above your shape layer! And position/size it to make sure it covers the entire shape.

Then go to Layer > Create Clipping Mask! And you have a super fun heart-shaped photo. Typically with these types of photos, I don't like to have the white background. So just click on your background layer and hit the delete bottom at the bottom of your layers. Then you'll have a transparent background. When saving your image out, just be sure to select ".png" as your file type! This way you can add it to a fun texture on a website or whatever. Have fun!